ぎょぎょっとほるが製作記 Making of Fisheye Holga
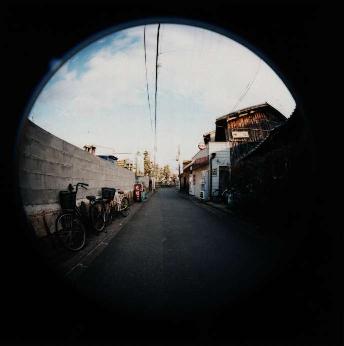
ぎょぎょっとほるがは、円像魚眼カメラです。Fisheye Holga is a camera for taking circular fisheye image.
「ニコン 面白レンズ工房 ぎょぎょっと20」という 35mm カメラ用の
対角魚眼レンズ(焦点距離20mm)の像を、ブローニーフィルムに写します。
The "Nikon amusing lens - Fisheye 20mm/F8" is a beginner's fisheye lens
for Nikon F-mount 35mm camera, made by Nikon.
(It is one of the limited lens set appeared Dec. 1996. The other lenses in this set are "400mmF8 telephoto"
and "90mmF4.8 Micro / 120mmF4.8 Soft". All lenses have no aperture leaves.)
My "Fisheye Holga" takes a circular image on a 120 film.
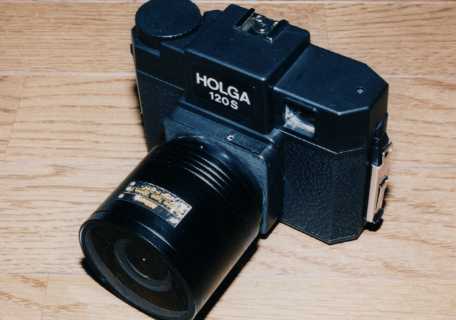
ぎょぎょっとほるが
Fisheye Holga
作例[Example photos]
ほるが分解[Disassenbling Holga]
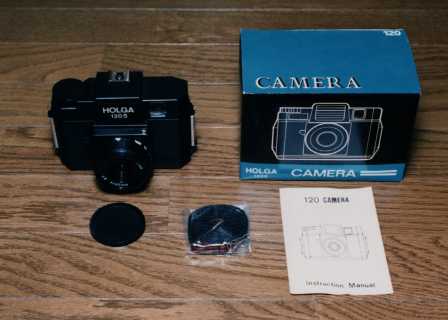
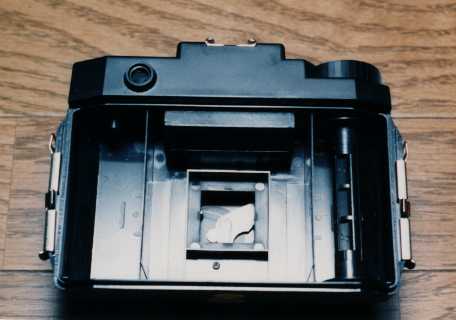
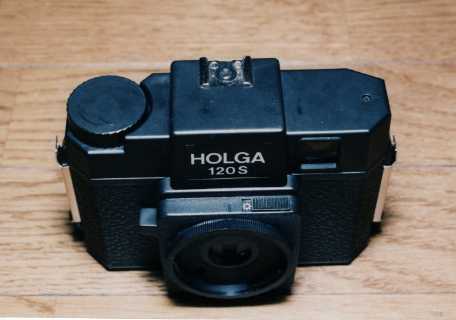
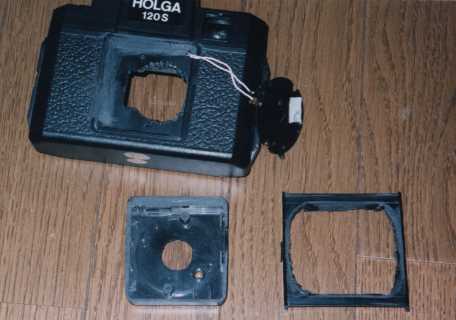
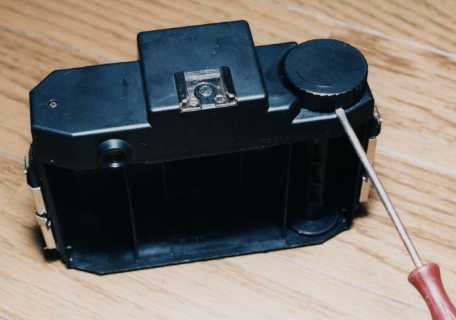
新品ホルガの中身です(新品のカメラを買ったのは、実は初めて
だったんです。)
These are in the box of New Holga 120S. (I bought this camera
as a NEW one .. It was the first experience for me! )
あと、面白レンズの「ぎょぎょっと20」も必要です。
"Fish-eye 20mmF8" lens in "Nikon Amusing Lens set" is necessary.
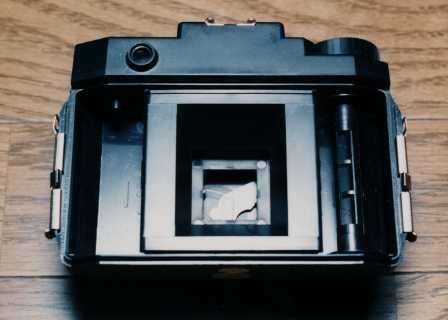
裏蓋を開けると、フィルムゲートがありますが、これははめこまれているだけ
ですので、引っ張って外します。
There is a film-gate in the camera. That part is only snapped-on
the camera body.. you can remove it by pulling out simply.
フィルムゲートの内側上下にネジが2つあるので、これを外します。
Take off two screws at inside of film-gate.
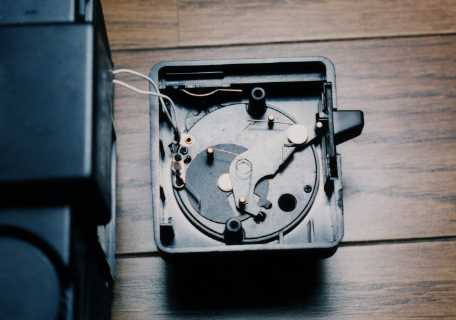
シャッターユニットです。単純ですね。左右2本のネジで止められているので、
これを外します。
This is a shutter unit .. single speed shutter, very simple.
It is fixed to the body by two screw on the shutter unit, take off.

役立たず?の絞りが見えますが、これは取ってしまいましょう。右下の穴の
奥にレンズの抜け止めのネジがあるので、緩めます。
It is the "useless" aperture leaf .. take out. Loosen the
lens-revolution stopper screw is in the hole (shown at lower-right).
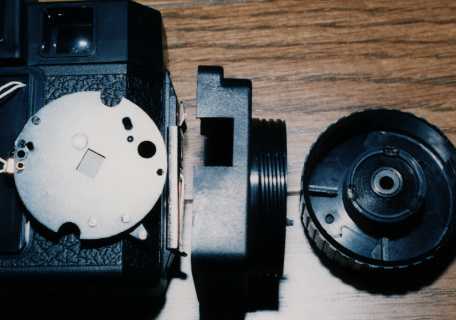
レンズはいくらでも回るようになるので、そのまま取ってしまいます。
これはブロニカにでもつけて、接写用に使うことにしましょう。
このヘリコイド?を切断して、Fマウントにしちゃいます。
シャッターユニットの開口部(長方形)が分かります。このぐらいの
大きさなので、ぎょぎょっと20しかつけられません。残念。
Lens can be rotated limitless, so take off.
Then cut the helicoid and convert it to the "F-mount".
You can see the open area of the shutter unit (rectangle),
it is too small to use with the lenses except 20mmF8.
Fマウント化[F-mount modification]
ヘリコイドの部分を取ります。ハンダゴテがあると楽ですが、それがなくても コンロでドライバーを熱しながらやっても出来ます。電熱器のニクロム線を 伸ばしてホットナイフにするという手もあります。僕は幼少のみぎりより ハンダゴテにはなじんできたつもりなのですが、なぜか行方不明なので ドライバーでやりました。こまめに熱しながらゆるゆるやりましょう。 プラスティックの蒸気は健康に悪そうなので要注意。
Remove the helicold. It is easy by using soldering tool. Heated screw driver or nichrome wire is useful, too. Be careful not to breathe in the plastic steam.
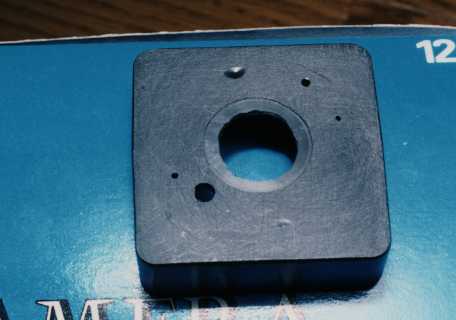
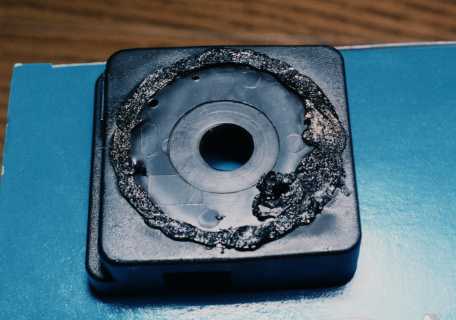
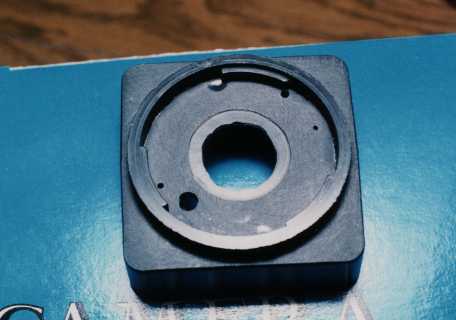
荒目の紙ヤスリを用意して、それを平らな床に置きます。
その上から、このエプロン部をごしごし削って平らにします。
ホルガのプラスティックは柔らかいので、すぐにこういう状態に
なってくれます。
Flatten the body parts. I used sandpaper on the floor
and flatten the parts by rubbing it upside-down.
It is easy to do it because the plastics of the holga is
very soft.
中央の穴を広げて、ぎょぎょっと20の後ろ玉を止めている金具が
ちょうど貫通するぐらいの穴をあけます。リーマを使いましたが
ナイフで削っても出来るでしょう。
Enlarge the center hole of the body parts to clear the rear-element
of the lens.
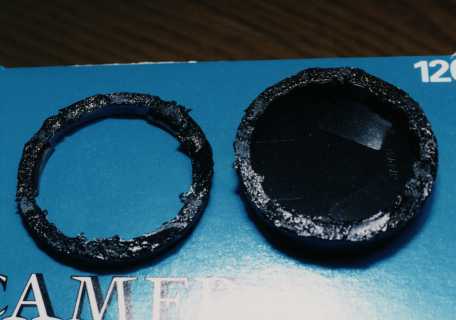
次に、同じ要領で、レンズのリアキャップを二つに割ります。十分な厚みを
残して切断するといいと思います。ニコンのやつを使うのがもったいないので??
タムロンのを使いました(いや、肉が厚くて好都合だったという説も)
To convert it to the F-mount, we use "rear-cap" of the F-mount lens.
I used rear-cap made by TAMRON. It is done by the same way, using
soldier or heated screwdriver.
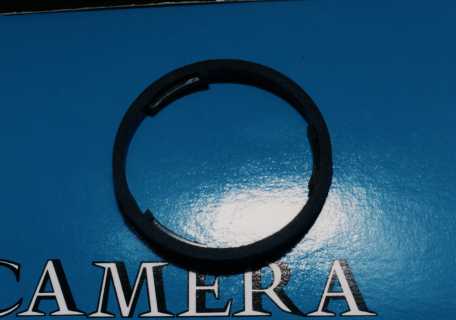
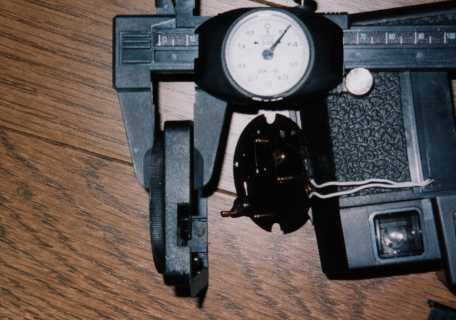
これも紙ヤスリで磨いて、切断面を綺麗にします。
傾くといやらしいので、定規かノギスで厚みを測りながら進めましょう。
Flatten it by sandpaper. Use scale or vernier caliper not to
tilt.
厚みとしては、レンズのマウント金具が飛び出さない範囲で、薄い方が
いいと思います。先ほど削ったエプロン部とシャッターユニットの位置関係
も関係しますが、はっきり言ってシャッターユニットの径がぎりぎりなので、
出来るだけ後玉がシャッターユニットに近づくようにしましょう。
僕の場合、接着剤の都合もあるので、0.5mm ぐらいマウントの方が厚い
ぐらいになるまで削りました。
It is to be desired that the tickness of the parts is enough thin
but the mount-parts on the lens must not over the body-mount parts.
Because the open area of the shutter unit is too small
so closer rear-element of the lens to the shutter unit avoids
the vignetting.
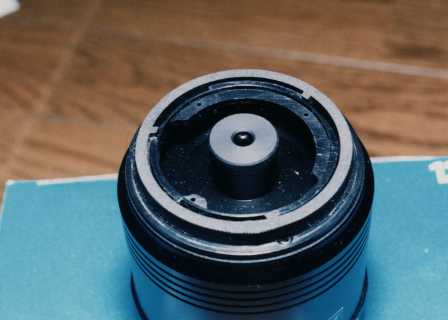
エプロンにマウントを接着します。シャッターユニットのちょうど真ん中に
後玉が来るように、実際はシャッターユニットをつけた状態で接着するのが
いいと思います。瞬間接着剤を使った場合は、その蒸気がレンズを
曇らせたりすることがあるので、要注意です。位置が決まったら、すぐに
レンズを外して乾燥させましょう。
Fix the mount parts to the body by glueing. Place the parts
to be set the rear-element at the right center of the shutter unit.
The steam of the Rapid adhesive sometimes damages the lens,
so put-off the lens after alignment then wait for drying.
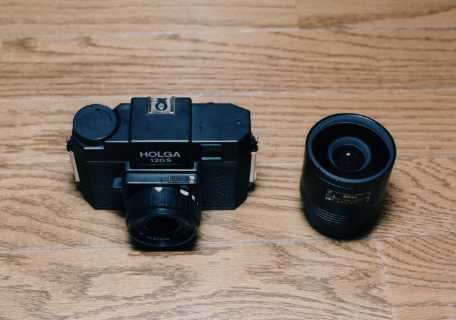
ボディに装着してみました。新型ニコンFマウントのカメラの誕生です。
(実際は絞り機構とかひっかかるから、たいていのレンズはつかないけど)。
Re-assembled body. A Novel Nikon F-mount camera is made!
(but only one type lens can be attached :-)
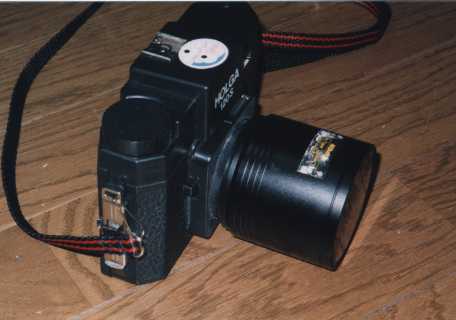
レンズをつけてみます。ブラックに統一されていて、なかなかイケてます??
持ってみると、すごくフロントヘビーです。レンズも簡単に抜けるので
要注意。
With the lens .. It's cool, black coordinate. But it is very front-heavy
and lens can be taken off very easyly (without lock), be careful not
to drop the lens!
しかしこのままでは、フランジバックが長すぎて、無限遠が出ていません。
でも、とりあえず期限切れの白黒フィルムで試写してみました。(coming soon)
Flange-back of the body is not adjusted so the image of the infinity
is blurred out. For the present, I took the photo by this camera
using B/W film. (coming soon)
フランジバック調整[Adjust the flange-back]
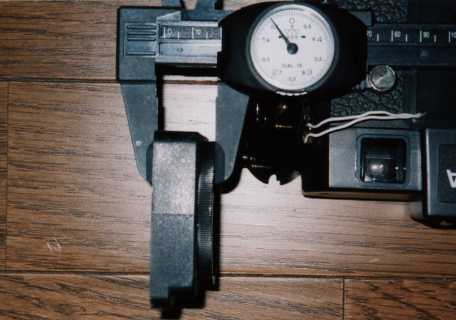
無限遠出しをします。Fマウントはマウント面からフィルム面までが 46.5mm と決まっているので、その分短くしなければなりません。 実際のフランジバックをまず測る必要がありますが、できたらノギスが あった方がいいでしょう。レンズが F8 と暗いので、おおよそでも そんなに大問題にはなりませんが・・・
Adjust the flange-back. The flange-back( from the mount-plane to the image(film) plane) of the F-mount is 46.5mm, so we must shorten the flange-back of the Holga.
At first, measure the present flange-back of the holga by vernier. If you do not have vernier scale, not disappointed. This lens is very slow .. F8, so it is not so sensitive :-)
その結果 6mm 程度長いようだったので、それを削ることにします。
フィルムゲートを前進させる手もありますが、それをやると今度は
赤窓あたりの工作(圧版工作、遮光など)が必要なので、エプロン部の
後端を削って短縮する(シャッターユニットごと、フィルム側へ後退
させる)ことにしました。最初はこれぐらい、20.5mm です。
Flange-back of my holga is 6mm too long .. grind out.
The other way is to modify the film gate, but it is a little
difficult to modify the film-pressure plate or read-window.
To solve it, I shotrened the body. At first, shutter housing
is at thickness of 20.5mm.
ひたすら修行僧のように磨き込みます。上で説明した、マウントの部品を
削る工作もこういう要領で、厚紙の箱の中でやると楽です。
マスクはした方が良かったなぁ・・・
Grind it as a Buddhist prienst :-) Please put on the mask not to
breathe in the dust.
約半時間、14.5mm まで短くしました。
Shortened shutter housing. It taken about a half hour.
エプロン部を短縮した結果、いろいろ不都合が起こります。まずはシャッターの
干渉。ボディの側で、干渉する部材を削り落します。ニッパーを使いました。
あと、エプロン部がすっきりはまらなくなるので、遮光用のリブの
一部も削り落しました。シャッターユニットの、真鍮の丸棒のうち、
シャッターボタンの引っ掛かる部分も切断して短くしました。
Shortened shutter housing causes some interfareing parts each other.
The first problem is the contacting the shutter unit to the body.
Cut the part of the body. Ribs to light shield is also removed.
Some parts of the shutter unit is also modified.
円像の直径が 645 だとわずかに蹴られるようなので、フィルムゲートを工作。
取ってしまう手もありますが、それではフィルム面の位置がずれること確実なので、
一応これも削りました。ただし、これはニッパーでばりばりやると
割れてしまいそうなので要注意。結局、これまで使わなかったコードレス
(ガス式)ハンダゴテでやりました。
裏蓋の赤窓の位置も入れ替えます(裏蓋の裏側から、6個所の
嵌め込み部を削り落すと入れ替えることができます)
I was afraid that the circular image will vignetted by the film gate
so I cut it. (Now I think it is not necessary)
シャッターボタンも薄くしないといけません。あちこちをこまめに
削って、指がちゃんとかかる程度に薄くしました。そうそう、マウント
のわきに穴をあけ、ネジを1本取りつけて、レンズの脱落防止対策
もやりました。
Shutter button must be modified. Then I made a hole at the side
of the mount to fix the lens by screw.
レンズをつけたところ。まだ遮光が完全ではないのですが・・
やはりスライドで撮ってみると、漏れてます ;_;
(coming soon) でも、さすが「ぎょぎょっと20」、逆光には
強い。太陽を画面内にいれても、何事もなく描写してくれるのは
すごいです。
面白レンズ付属のシールでドレスアップしましょう。
その後、要所に遮光用のモルトを張り、使えるようになりました。
とりあえず、完成です。
Some modification to the body causes the light leak. I did the light
shield enough then This camera is perfectly usable. 20mmF8 lens
is very good at back-lighting so I got clear images by the camera.
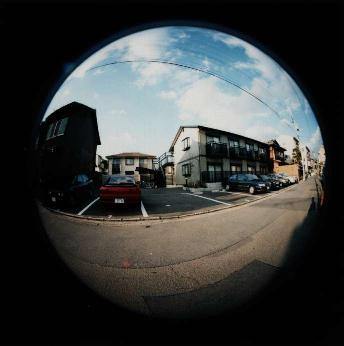
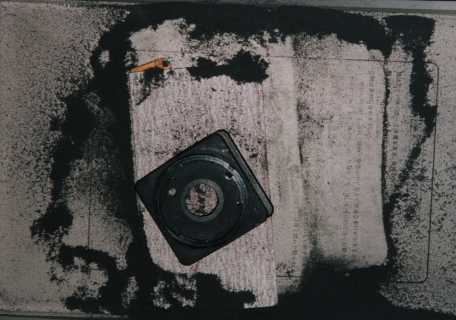
 作例[Example photos]
シャッター速度は約 1/100, F値は約8なので、晴天日向であれば
ISO100 はばっちりです。
日中であれば、ISO400 を込めれば写ルンです状態で使えるでしょう。
ISO100, F8 の設定ができる外光オートのフラッシュがあれば、
室内でも使えます。ただし魚眼の画角はカバーしてくれないので ^^;
センターイメージ的な感じになります。
Shutter speed is about 1/100 sec, and F No. is F8, so ISO 100
film is usable at the outdoor scene. ISO 400 film is more useful,
I think. It is also usable with auto-flash.
軍艦部の外し方[How to remove the top cover]
ちなみに軍艦部を分解するには、まず巻き上げダイアルを外さないと いけません。接着されているので、こんな風にえいやっ と取ります。 ネジが二つ出てくるので、左の1つと合わせて3本抜きます。
At first, remove the advance dial. It is glued, so use the screwdriver to remove it. then put out the 3 screws on the cover.
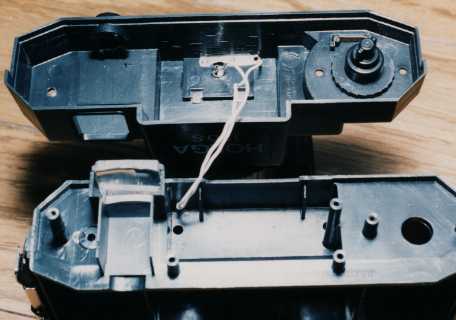
・・・この空間、どうしてやろうか。って感じです。ファインダも
こりゃまた、・・・電池ボックスとフラッシュをつけたり、露出計を
入れたらクールかも知れません。(でも露出計入れたところで、
シャッター速度も絞りも固定なんですけど)
Large, unused area is appeared. Flash and battery compartment
will be able to let in.
撮影機材:[To make this site:]
Nikon FG + Ai50mm/F1.8S(US) + SB-20 (with close-up rings), Reala ACE
Canon IXY, Nexia 200(後半、ノギスのところから5点)
関連ページ
ホルガ改良(露出計、距離指標、フィルム圧板) by 光永さんHolga Modification by Mr. Mitsunaga (lightmeter, disntance scale and film pressure plate)
中判カメラのためのニッコールレンズ
Medium-format Nikkor (Medium-format Cameras with Nikkor)